Raven - Linkedin Information Gathering Tool
Introduction
Last summer I wrote a simple tool named Raven, which would extract public information from Google and Linkedin and build e-mail list that could be used by pentesters. I mainly wrote it just because I needed it and later decided to publish it. To tell the truth I didn’t except that much attention to that tool and I have always wanted to update it but I was busy working on other projects etc. Finally I found some free time and I updated the tool, rewritten it in Go, made it more easy to use and more faster. In this blogpost I will describe the main idea of the tool , how it works and how to use it.
Disclaimer
Please do not use this program to do stupid things.

The author does not keep any responsibility of any damage done by this program.

USE IT AT YOUR OWN RISK.
Installation
You can use the precompiled binary, but also you can compile from source.
You need to install chromedriver even if you use a precompiled binary or compiling from source.
Dependencies
- https://github.com/chzyer/readline
- https://github.com/gorilla/mux
- https://github.com/mattn/go-sqlite3
- https://github.com/olekukonko/tablewriter
- http://gopkg.in/gcfg.v1
- https://github.com/sclevine/agouti
How it works
The main idea is that given a company name, searches all possible matches of Linkedin Employees in Google and then extracts their data. Based on that, it can build e-mail addresses in different formats, export them and also check them in haveibeenpwned.com.
The previous version of raven allowed you to extract data only after finishing a scan and only in a specified format. In case you wanted to extract the same info but with a different e-mail format , you needed to re-run the scan which wasn’t very practical.
In this version it is possible that given a scan, you can export the data as many times as you want, in different formats and also check them in haveibeenpwned.com with only one command.
Scan
A Scan is the process of extracting the public information from Google and Linkedin and storing it in the database.
To create a scan you can run the command new scan this will bring you to the scan instance. There are some properties that should be configured before running a scan as can be seen below.
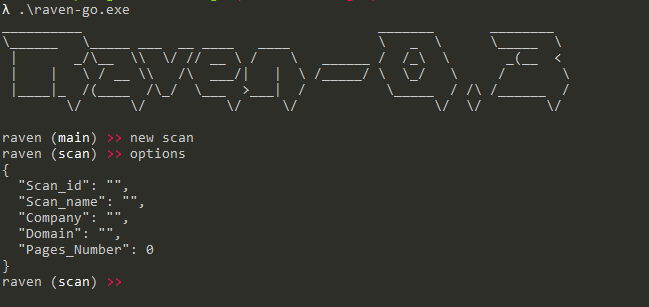
Scan_id- Can’t be changed, is the scan id which is used as a PK in the database.Scan_name- The name of the scan, used later when you want to export data.Company- The name of the company that you want to extract employees.Domain- This is the subdomain of the main LinkedIn website. If you want to target a specific country you can specify the subdomain. For example , Albania has the subdomainal. In case you don’t know the subdomain usewww.Pages_number- The number of Google pages to extract information from.
Running the command options you can see the properties and values that are assigned.
Below is an example scan:
After setting the properties you can use start to start the scan.
The scan will insert the data in the database so that you can use it later.
Export
After finishing the scan, you can use the data by running use (scan_name).
This will bring you to export instance. The export instance allows you to export the data in different formats and check them in haveibeenpwned.com .
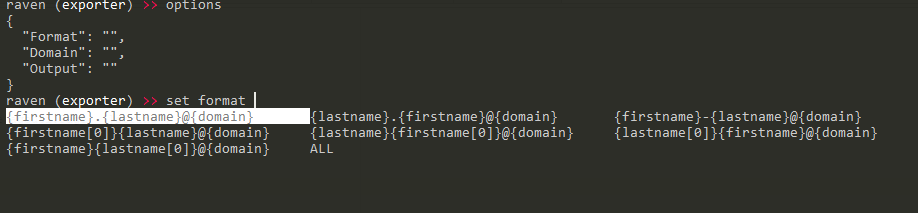
The export instance has 3 properties.
Format- The format of the e-mails.Domain- The domain to append to the “usernames”.Output- Filename to write the output.
Below are the avaible formats. You can use also the ALL in case you want to generate all the avaiable formats, and then use a custom tool to verify the e-mail addresses.
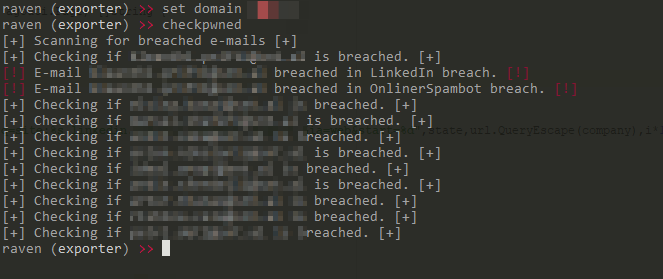
After specifying a format and a domain, you can export them using the export command or check if they have been breached by using the checkpwned command as can be seen below.
Remarks
You can find this tool on my Github profile : https://github.com/0x09AL/raven.
I’m planning on adding new ways to verify e-mail addresses, fix bugs when they come out and I’m very interested on getting new ideas to implement.